
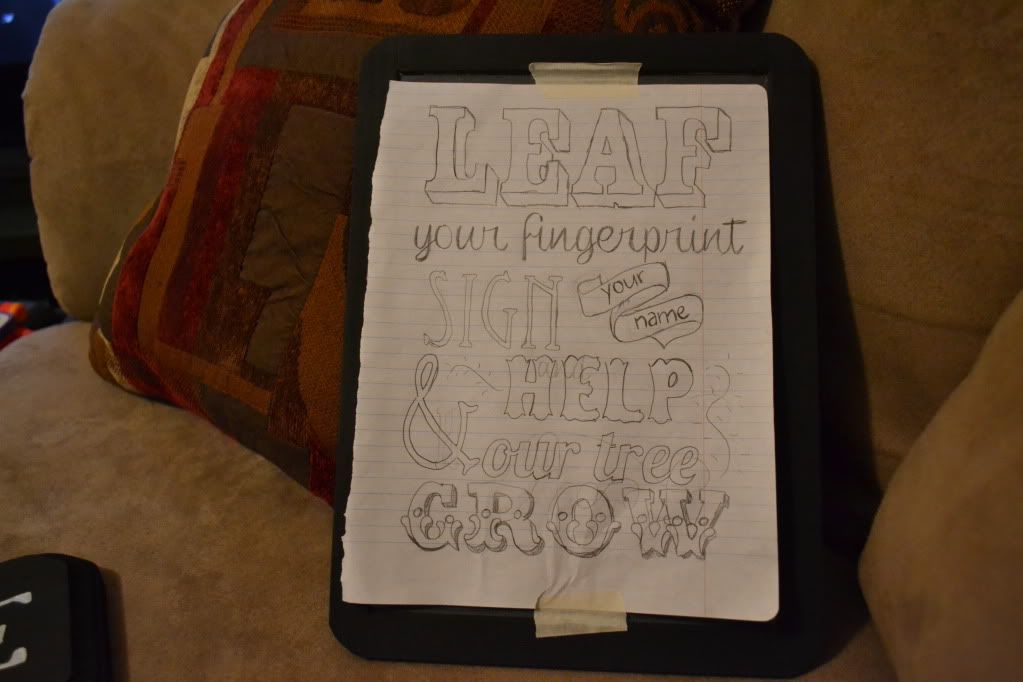
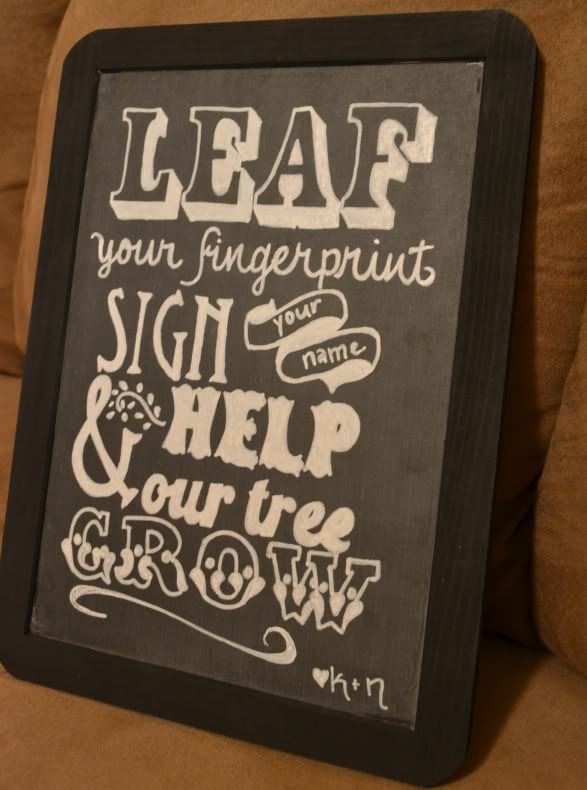
First up is my guestbook chalkboard for instructions; not sure what to call it, really! I'm sure I've mentioned before, but our guestbook will be a poster print of a tree, for our guests to put their fingerprint on and then sign. I figured instructions would be helpful since some may not understand what they're supposed to do. So I bought this chalkboard at Hobby Lobby for $2.99. I painted the border (which was plain natural wood) with black acrylic craft paint.
Then it gets tricky and hard to explain. I used a Word document to create the words I wanted in different fonts, in the appropriate sizes. This took some trial and error. (To make this party easier would be to print them in the format you want; however, I don't have a printer, so I improvised!) I taped a sheet of notebook paper to my laptop screen, and with a pencil traced the words in the format I wanted. This is easy since the laptop screen is illuminated and shows through the paper.
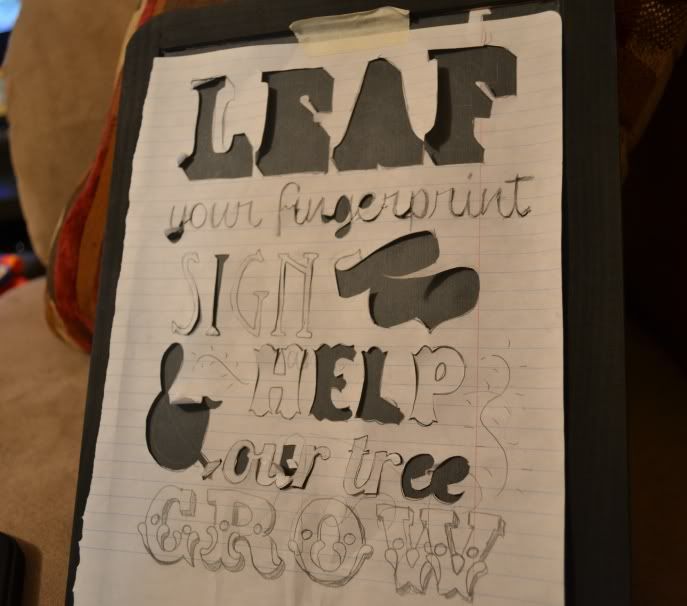
Then I taped the paper to the chalkboard, making sure it's centered. Also make sure it's taped securely! Using an Xacto knife, I carefully cut out each line of each letter, making sure that I was also tracing onto the chalkboard. What this does is scrape the chalkboard, creating a faint scratch.
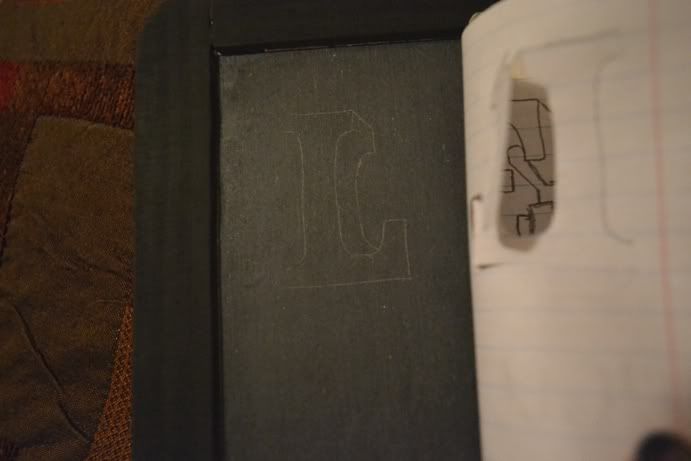 |
| shows the faint lines that the Xacto blade leaves after tracing the letters! |

Next I used a fine-point paint pen from the craft section of the store. I chose white because I wanted it to look like chalk, without using chalk (so it couldn't be ruined by the swipe of your hand!) I carefully traced each word, and filled in the letters I wanted. I went over it about 3x to get them as opaque as I could. Here's the finished product:

- Leaf: Rosewood
- Your Fingerprint: Clipper Script
- Sign, &: Eccentric
- your name: my own handwriting
- Help: Tuscan
- Our Tree: Lobster
- Grow: JFRingMaster
All of them either came free with Microsoft or were downloaded from DaFont.com!
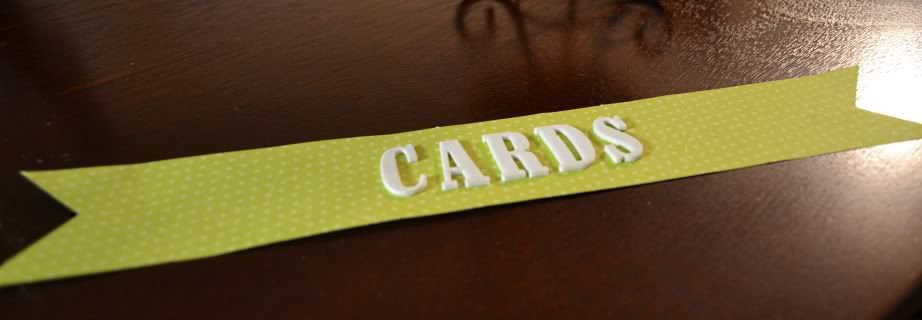
Next project is my sign for our cardholder. I'll be using the white Wilton birdcage cardholder, and have plans to line the bottom with moss and decorate it with ribbon flowers. I used a sheet of green patterned scrapbook paper from Hobby Lobby, and cut it into the shape of a banner. I had some old foam-y scrapbook letter stickers, so I used those to write "CARDS" on the banner. I love how easy it was and how it looks!
This is a birdcage I use for decoration in my home, but I think it illustrates how the banner will be used - just weaved through the wires of the birdcage:

And last but not least - our mostly-finished chair signs. I bought the wooden plaques at Hobby Lobby for .99 each. Using the same black acrylic craft paint that I used on the chalkboard, I painted them in 3-4 thin coats. I used the same method as I did with the chalkboard to trace the words "Bride" and "Groom" onto notebook paper, and placed over the plaques. Using a sharply-pointed old pen, I traced the words, so it left an indent on the plaque. Then I traced over it & filled in with a medium-point paint pen in Silver.

Up close you can see the indents from tracing, but for me it's no big deal. I do need to attach ribbon to the back of these so they'll hang from our chairs, but that's simple. Oh, and the font I used for this was Simon Script (should also be available on DaFont).

I'm glad that my DIYs so far have been successful! I'm actually running out of things to do, so I'm going to start buying some bigger items. Can't wait! Tell me what you think of my DIYs, if you please :)
No comments:
Post a Comment